Transcript
00:05Bernie's new line of insulating piercing connectors cover a wider conductor range and
00:10now include a sheer bolt for quick and easy installation.
00:14The wire range has been expanded to accommodate a run from number eight A WG to 750 KC
00:20mil and a tap from number 14 A WG to 500 KCM.
00:25A simple wrench or impact driver with appropriately sized socket is all that is
00:30required to install these tapping and splicing connectors.
00:33Each connector is range taking, they are cul us listed and are A L nine CU rated for use
00:40with copper and aluminum conductor because they utilize insulation piercing technology,
00:46stripping insulation from conductor is not required and tapping applications can be
00:51completed without cutting the run conductor. Each B I PC connector is supplied with two end
00:56caps. The end caps can be placed on the tap or run on
01:00either side of the connector to allow for splicing and dead end applications or can be
01:04removed for tapping applications.
01:07All end caps contain an internal rubber seal that produces a watertight seal.
01:12The end of the conductor should be inserted fully into the rubber seal during splicing and
01:18dead end applications should be inserted fully into the rubber seal.
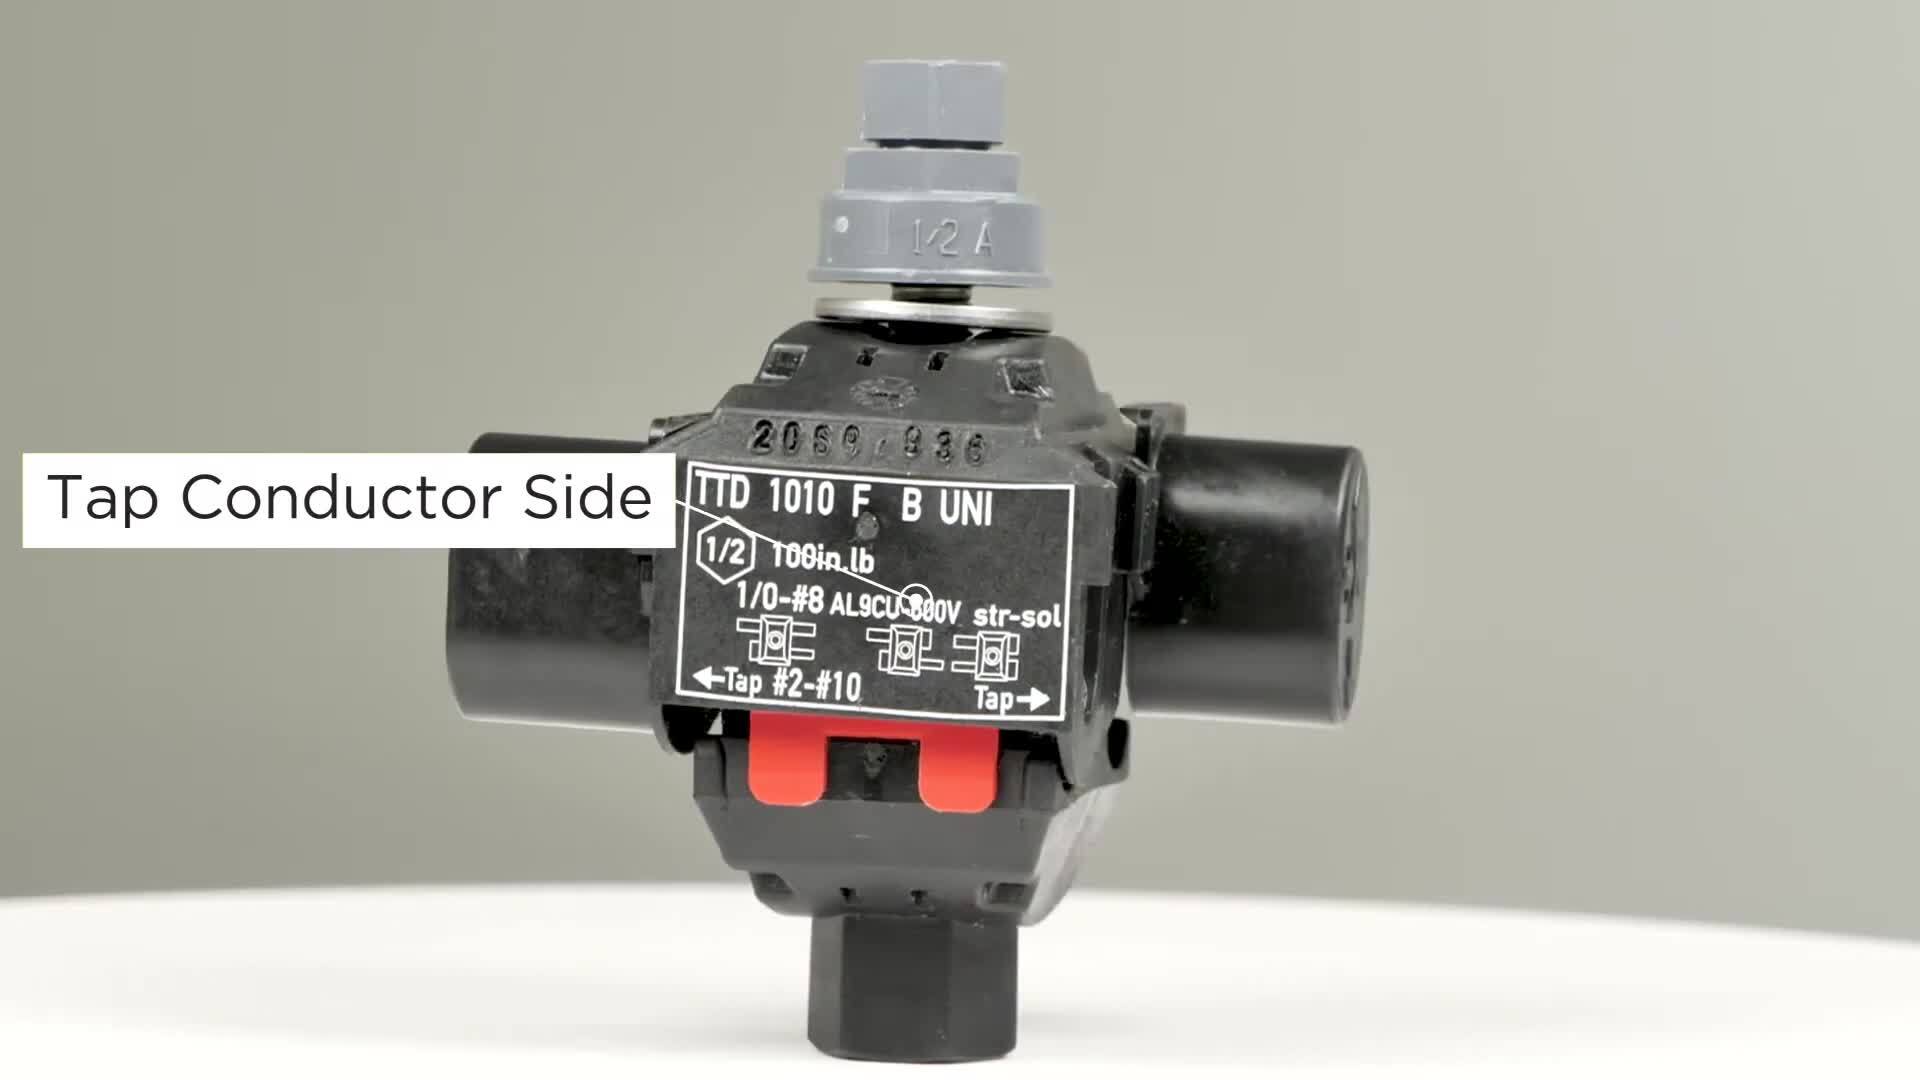
01:21During installation, the open side of the connector is for the run conductor in tapping
01:26applications. While the side containing the product
01:29information is for the tap conductor.
01:32The top of the connector contains a shear bolt for easy installation,
01:36the uppermost hex is used to tighten the connector during installation,
01:40the wrench or socket size required for installation is inscribed in the base of the
01:45bolt. The large hex beneath the tightening hex can be
01:48used to remove the connector from the conductor if needed.
01:53There is a red turbo spacer located on the inside of the tap side.
01:57This spacer is used to hold the connector open to assist with the installation of the tap or
02:02splicing conductor. The spacer will snap off during installation to
02:06allow the insulating teeth to pierce through the tap or spice conductor insulation
02:12begin by removing or relocating the end caps to their desired location.
02:21Place the connector over the run conductor and hand tighten the installation bolt measure the
02:28tap conductor so that it will be fully inserted into the end cap seal.
02:32Insert the end of the connector into the tap side opening until it is fully seated using a
02:38wrench or impact driver and socket, tighten the bolt until it shears off if needed.
02:44The connector can be removed from the conductor by reversing the bolt using the remaining hex.
02:53For more information, visit bernie.com.
02:57Thank you.

Burndy New Insulating Piercing Connectors
- private
- electrical contractor
- electricalcontractor