Transcript
00:00I devices, thermostat has been designed to make installation as simple as possible,
00:05making it quick to get up and running to get started, gather the tools you will need in the
00:11box. You will find the I devices, thermostat,
00:14wall mounting plate, screws and screw anchors and the installation.
00:18And quickstart guides power off your HVAC equipment at your circuit breaker panel.
00:23If you have an emergency boiler, shut off, switch, turn off the power to your boiler as
00:27well. Once you verified the power is off carefully,
00:31remove the face plate of your old thermostat to ensure your HVAC system is compatible.
00:36Visit I devices, inc.com/compatibility.
00:40Make sure your HVAC system doesnt have any 120 or 240 volt wires.
00:46Look for thick black wires with wire nuts.
00:49If you do have 120 or 240 volt wires, I devices, thermostat is not compatible with your system.
00:55If you are unsure, you can contact the I devices.
00:58Customer experience team, take a picture of your old thermostats wire arrangement for
01:03future reference I devices. Thermostat requires a 24 volt common wire also
01:10referred to as AC wire in order to power on the common wire is the wire connected to the C
01:16terminal at your existing thermostat disconnect the wires from the existing mounting plate,
01:21make sure the wires don't fall back into the wall.
01:24Remove the mounting plate from the wall head over to the wiring configuration section in
01:30your thermostat installation guide to find the configuration that is closest to your old
01:35thermostat. And note which system you have for later
01:38reference line up the mounting plate on the wall in the desired location,
01:43check that it is level and the wires are in a position to fit through the hole on the
01:47mounting plate. You may need to drill new holes in the wall for
01:50the new mounting plate. If so use the provided screws and anchors,
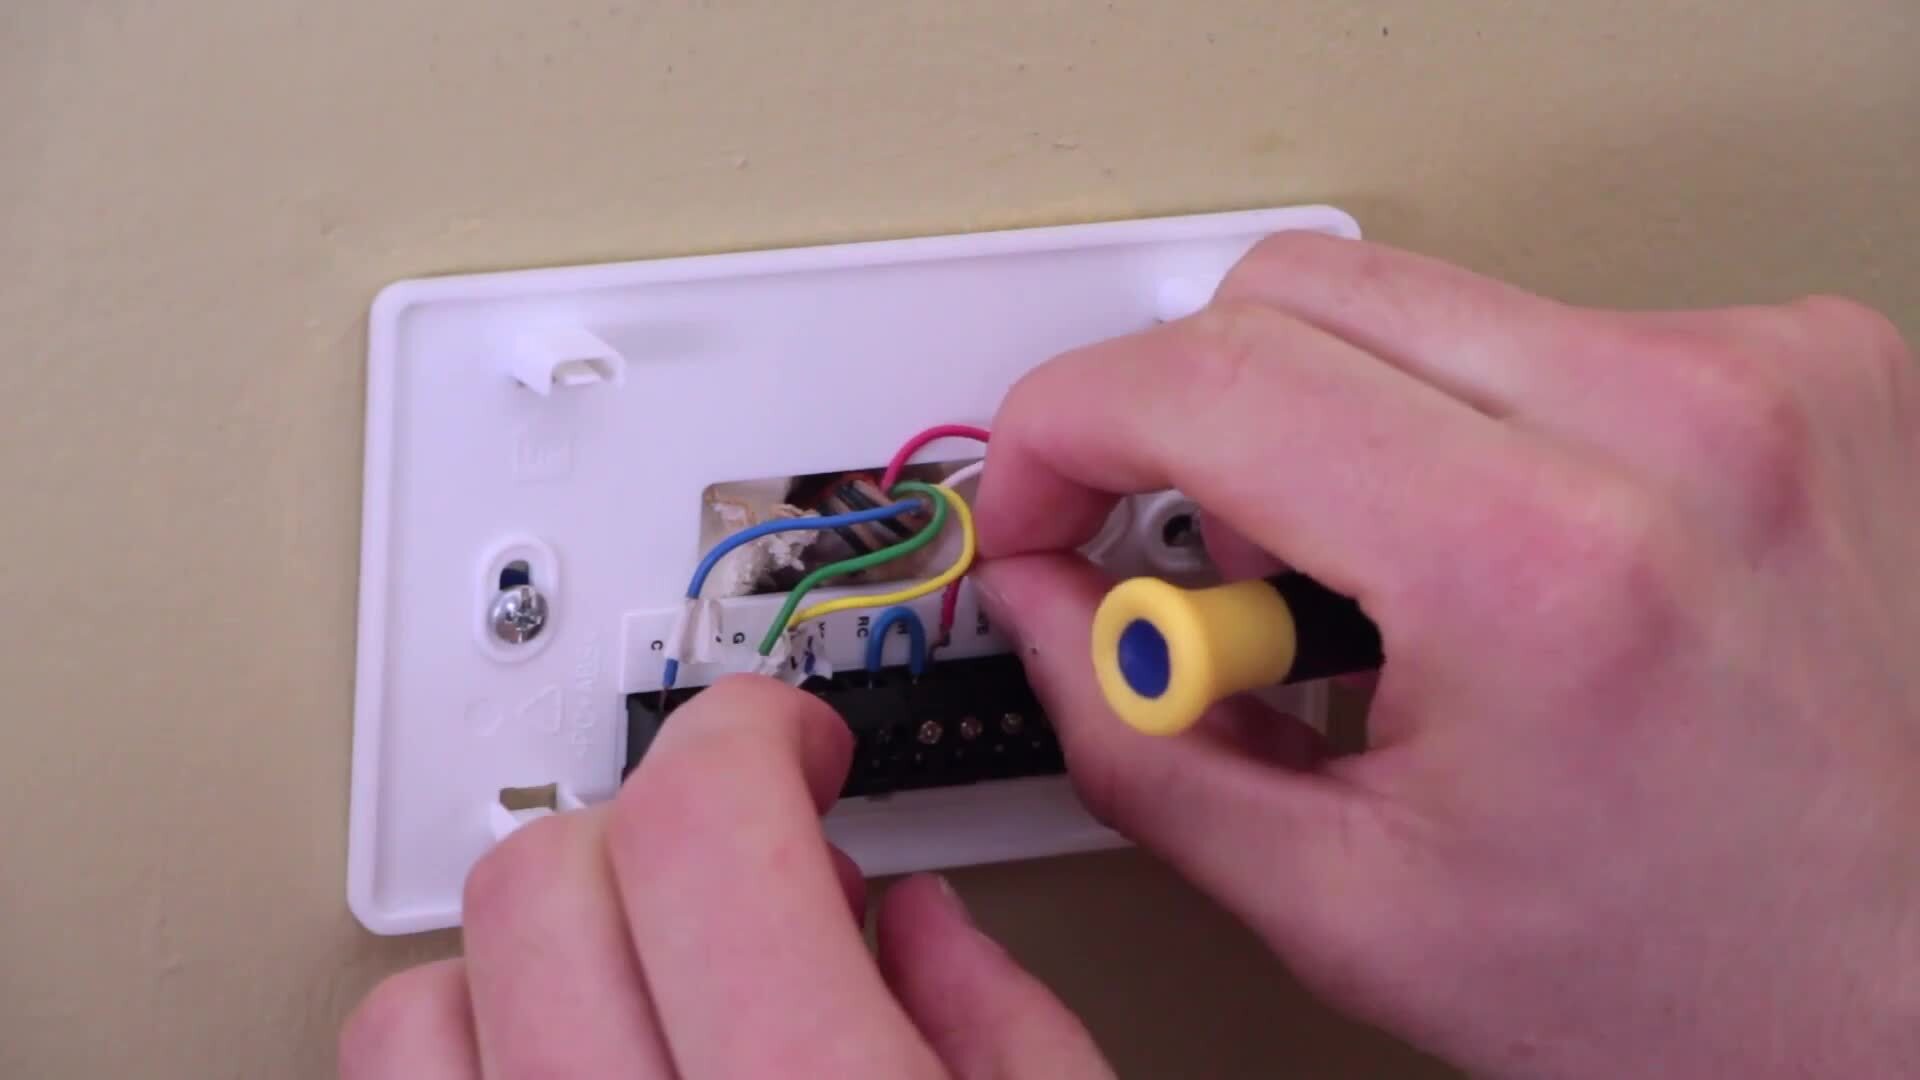
01:55insert the wires into their corresponding terminals and secure them by tightening the
01:59screws. If you only have one R wire, leave the blue
02:02jumper connected between the RC and Rh terminals.
02:06If you have two R wires, remove the jumper to prevent electrical shorts and damage to your I
02:12devices, thermostat or home, ensure all of the wire connections are secure and there are no
02:17bear wires in contact with another insulate, bear wires with electrical tape.
02:22If necessary, attach your I devices thermostat to the mounting plate by pressing gently into
02:28place until it clicks, turn your power on at the circuit breaker and turn on your boiler
02:33power as well. Your I devices thermostat will take a few
02:37seconds to turn on and display the connecting thermostat to network screen.
02:43Ensure that your IOS device is connected to your homes,
02:46wifi network.
02:47Download the free I devices connected app in the Apple app store.
02:52When you open the I devices connected app, tap, the thermostat listed at the top of the screen,
02:57your home's wifi network will appear in the list tap.
03:01Next tap done when thermostat has joined the network, check your thermostat to ensure the
03:07display reads, identifying device tap Yes, to confirm if this is your first home kit product,
03:14you will be prompted to set up your home kit home.
03:17The I devices connected app will walk you through creating and customizing your home and
03:22your first room. You'll now need to enter the home kit code
03:25displayed on thermostat's screen. If your IOS device is running IOS nine or later,
03:30your camera will turn on point your device's camera at thermostat's display to capture the
03:35home kit code. Once the home kit code is entered,
03:38you will be prompted to customize your thermostat.
03:41This is your chance to give thermostat a unique name and photo.
03:45This will help you identify it within the app. And when using Siri,
03:49your thermostat is now paired to the I devices connected app.
03:52The last step to set up your I devices, thermostat is to set your HVAC system type in
03:57the thermostat setup menu. Refer to the installation guide in the box
04:01labeled thermostat settings for the HVAC stage and type for your home for oil and gas furnaces,
04:08change the type from electric heat to gas or fuel oil.
04:11If you have a heat pump, change the stage to heat pump.
04:14The type based on your home's heating system, electric or gas and set the OB type.
04:22Congratulations. Your thermostat is now set up.
04:25You can control your thermostat from the app or by using the up and down arrows on the face of
04:30thermostat for additional help visit I devices. Inc.com/support.

iDevices Install Guide iDevices Thermostat (C-Wire Required)
- private